Such a pity.— Rhapthorne, usually before or after defeating an opponent
Lord Rhapthorne is the main antagonist of Dragon Quest VIII. A demon of untold legend, Rhapthorne is the party's final opponent in their quest to rid the world of an evil curse.
Rhapthorne conquered the World of Darkness and created a gate that bridge to the World of Light in preparation for his invasion. Empyrea, who can move freely between the two realms, learned of these intentions so she enlisted the help of the Seven Sages to stop him. They eventually sealed him inside the Godbird Sceptre using each of the Seven Sages' essence which should preserve the seal so long as an heir to each of the seven bloodlines exist in the world. Dhoulmagus learned of Rhapthorne's existence through one of Rylus' grimoires and sought to attain the latter's power. Rhapthorne took this chance to enslave Dhoulmagus to break the seal for his return.
Biography[]
Main Games[]
Dragon Quest VIII[]
Dhoulmagus's Trail[]
Before the game's events, Rhapthorne was sealed inside the Godbird Sceptre and locked inside Castle Trodain. When Dhoulmagus stole the Sceptre, Rhapthorne possessed him and used him to kill the heirs of the Seven Sages, starting with Master Rylus, who just completed his elixir after scolding his former apprentice.
In the aftermath of killing Golding, Dhoulmagus was injured and retreated into the Dark Ruins to recover. As a safe pre-caution, he enchanted the ruins with a dark aura rendering any wanderer lost in an abyss. In order to get in, the protagonists used a newly charged Sun Mirror to emit a condensed burst of light that destroyed the aura. When the party entered the depths of the ruins, they cornered and defeated Dhoulmagus. Not knowing of the existence of Rhapthorne despite the murals showing him and his story, (Though only Angelo knew, as evidenced by the party chat) the party thought with the demise of Dhoulmagus the curse would be lifted. Despite Dhoulmagus's efforts to rest and fight (Even getting a power boost from Rhapthorne), he is defeated, but the curse is not lifted. Unsuspectingly, Jessica picked up the Sceptre and became possessed by Rhapthorne.
Evil Jessica Attacks[]
The protagonists wake up the next day to find that Jessica has gone missing. They begin searching for her and eventually find themselves in Arcadia. When the Hero enters Dominico's mansion, she is just about to kill him. Jessica says that she doesn't feel like killing all three of them so she leaves, but not before warning Dominico to build a better magical barrier. The protagonists eventually realize that she is possessed. Later, she attacks again, with her learning that David is the heir that needs to be killed, and the player has to fight her. When she is defeated, the Sceptre is knocked out of her hand by Dominico's spell, freeing her from Rhapthorne's control. However, Sir Leopold, Dominico's dog, picks it up in his mouth and is possessed by Rhapthorne. Rhapthorne, through Sir Leopold, then kills David and leaves town, heading north.
Sir Leopold's Bloody Trail[]
Rhapthorne next targets Marek, a doctor in the town of Ortusk, commanding a pack of Hellhounds to attack him. However, he realizes that even though he has sage's blood, Marek is not the one he is after and decides to target Marek's mother, Marta, who is the real heir to one of the seven sages. Despite Marta protecting herself from the Hellhounds he sends after her, Rhapthorne manages to kill her in a fit of rage after being temporarily blinded when Marta throws nook powder in Sir Leopold's eyes in order to save Marek, who Rhapthorne was using as a hostage.
He then transforms Sir Leopold into a demonic winged dog, then flies off to the Lord High Priest's residence to kill the Lord High Priest, who is also descended from the one of the seven sages. However, the Hero and his party fly after him and fight before he can kill the Lord High Priest. After the defeat of the possessed Sir Leopold, he reverts back to his original form and dies.
The Lord High Priest is then shown to have collapsed, but is still alive. However, Marcello, Angelo's half-brother, enters the room, confiscates the scepter, and has the party framed for attempting to murder the Lord High Priest and sent to Purgatory Island. Later, Marcello is seen holding the scepter, where it is revealed that he killed the Lord High Priest. Vines suddenly spring out of the staff and try to take over Marcello, but he stabs himself to resist becoming possessed. After escaping from Purgatory Island, the party confronts Marcello at the Holy Island of Neos and defeats him.
Resurrection of the Black Citadel[]
However, after being defeated, he is possessed by Rhapthorne, who uses him to throw the scepter into the goddess statue which contains his body and the Black Citadel. Afterwards, the area around the statue is destroyed and the Black Citadel floats into the sky.
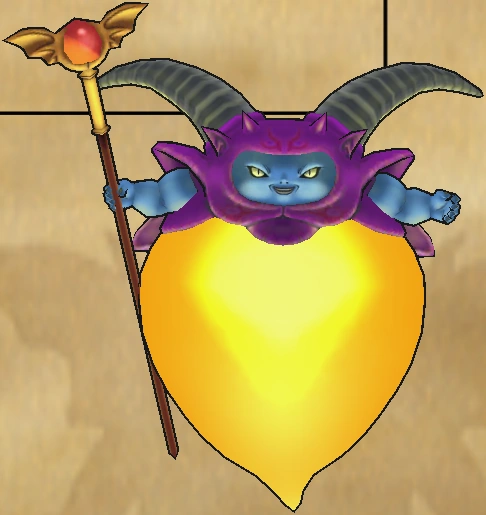
The party then enters the citadel and finds Rhapthorne. They engage in battle with Rhapthorne and defeat him. He then flees the citadel and makes it collapse. He then sends Ruin to distract the party. After Ruin is defeated, he transforms into his true form and attacks the party, making them black out. Empyrea tells the party that they must gather the Sages' orbs in order to fight Rhapthorne in his true form.
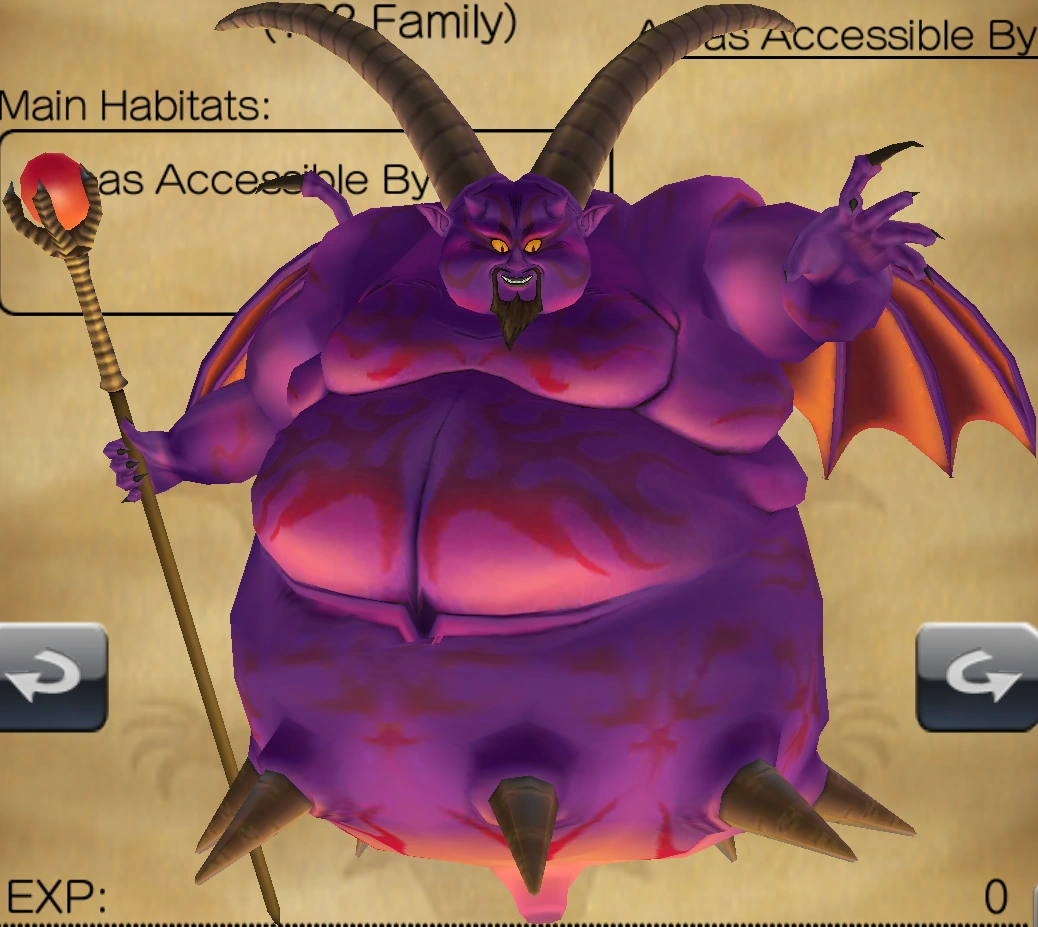
Once the heroes gather all of the seven orbs, they confront Rhapthorne alongside Empyrea, breaking his barrier of darkness and defeat him, lifting the curse on Trode and his daughter, Princess Medea.
First Phase[]
| #286 - Rhapthorne ??? Family | |||||
|
HP | MP | Attack | Defence | Agility |
| 4850 (PS2) 5350 (3DS) | 255 | 346 | 186 (PS2) 196 (3DS) | 115 (PS2) 125 (3DS) | |
| Exp | Gold | Drop | None | ||
| 0 | 0 G | ||||
| Note: The Lord of Darkness. His soul is imprisoned in the magical scepter of Trodain Castle, while his physical form is entombed within the Goddess Statue on the Holy Isle of Neos. He dreams of ruling the World of Light. | |||||
| Abilities | |||||
| Normal attack Attacks twice Desperate attack Disruptive Wave Freezing Blizzard Dazzleflash Lullab-Eye | |||||
| Spells | |||||
| Kafrizzle Kaboom | |||||
| Haunts at: | |||||
| Black Citadel | |||||
Final Phase[]
| #287 - Rhapthorne ??? Family | |||||
|
HP | MP | Attack | Defence | Agility |
| 5640 (PS2) 6500 (3DS) | 255 | 428 (PS2) 448 (3DS) | 161 (PS2) 191 (3DS) | 115 (PS2) 125 (3DS) | |
| Exp | Gold | Drop | None | ||
| 0 | 0 G | ||||
| Note: The Lord of Darkness himself, taken physical form, and grown powerful enough to absorb the massive Black Citadel into his new body. | |||||
| Abilities | |||||
| Normal attack Attacks twice per turn Bursts out in defiant laughter (Wastes turn) Slap on the Chops Scepter Ball Starfall Wrath of the Gods Freezing Blizzard Inferno Meditation Lullab-Eye Says an evil prayer (Restores all MP) | |||||
| Spells | |||||
| Kafrizzle Kaboom Magic Burst | |||||
| Haunts at: | |||||
| Areas Accessible By Air | |||||
Dragon Quest IX[]
Battles[]
| #307 - Rhapthorne ??? Family | |||||

|
HP | MP | Attack | Defence | Agility |
| ??? | ??? | ??? | ??? | ??? | |
| Exp | Gold | Drop | Multiple | ||
| ??? | 2490 G | ||||
| Description: Evil incantations and Kafrizz form just part of this portly demon's plan to exterminate his enemies. Lick him with light.
Some say his body is so big that is contains enough cursed power to contort the space-time continuum itself.
| |||||
| Encountered at: | |||||
| Grotto | |||||
Rhapthorne appears as a Legacy Boss, obtained after completing Quest #179 (or received at special events).
Treasure[]
|
Skills[]
|
Battle Strategy
You should have a Priest and/or a Sage in your party. Equip that character with Minstrel's Manual to enable Gritty Ditty. The other three characters can be Warriors and/or Paladins. Equip these with Falcon Blades or Uber Falcon Blades. One of your fighters needs to have learned Fource abilities, equip that character with Armamentalist's Album to use Fources on all party members. Equip your healer and Fource caster with Meteorite Bracers or at least Agility Rings.
1st Turn: Cast Gritty Ditty and Life Fource on your party while the fighters use Falcon Slash.
2nd Turn: Cast Gritty Ditty a second time and have the 3 fighters using Falcon Slash.
Remaining Turns: Continue to Falcon Slash with fighters. Healer can either attack to drain MP or heal as needed. Paladins can intercept hits and return spells with Bounce.
If the boss uses Disruptive Wave, start the above steps over.
Monsters series[]
Dragon Quest Monsters: Joker 2[]
Rhapthorne[]
The first form of Rhapthorne is a powerful one-spot monster that is a great addition to most teams. To obtain it, perform the following Special Fusion:
| Joker 2 Synthesising | ||||||||
| Monster | Monster | Result | ||||||
| Dhoulmagus | + | Mortamor / Nimzo | = | Rhapthorne | ||||
| Synth type | Special Fusion | |||||||
Rhapthorne II[]
The final form of Rhapthorne is a tremendously strong three-spot monster that can prove to be a useful mage. To obtain it, perform the following Special Fusion:
| Joker 2 Synthesising | ||||||||
| Monster | Monster | Result | ||||||
| Rhapthorne | + | Zoma / Orgodemir | = | Rhapthorne II | ||||
| Synth type | Special Fusion | |||||||
Dragon Quest Monsters: The Dark Prince[]
In this game, you can only obtain the final form of Rhapthorne. Because size is not dependent on species anymore, you can either have a large Rhapthorne or a small Rhapthorne.
| The Dark Prince Synthesising | ||||||||
| Monster | Monster | Result | ||||||
| Evil Sir Leopold | + | Dhoulmagus | = | Rhapthorne | ||||
| Synth type | Special Fusion | |||||||
| The Dark Prince Rank and Slot No. | |
| Rank | S |
| Slot No. | 500 |
Side Games[]
Theatrhythm Dragon Quest[]
Gallery[]
")
")
")
.png "Rhapthorne1 (PS2).png (37 KB)")
.png "Rhapthorne1 (3DS).png (17 KB)")
.png "Rhapthorne2 (3DS).png (53 KB)")
Sprites[]
| Main Games | |||
| VIII | IX | X | XI |

|
|
||
|
|||
| Side Games | ||||||||
| Joker | Joker 2 | Joker 2 Professional | Terry's Wonderland 3D | Iru and Luca’s Marvelous Mysterious Key | Heroes: The World Tree's Woe and the Blight Below | Stars | Super Light | Joker 3 |

|

|
|
||||||

|
|
|
||||||
Trivia[]
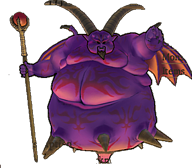
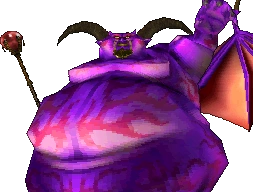
- Coincidentally enough, Rhapthorne's final form resembles the Baron von bellycoses in that both are purple demons with a large belly.
- However, the Baron von bellycoses are based on Cardinal Sin, one of Orgodemir's henchmen, and a normal monster enemy.
- Additionally, the final boss of Blue Dragon Awakened Shadow (Last Slavery) also resembles Rhapthorne.
- Unlike other Dragon Quest villains, Rhapthorne is the most recurring threat in his game. He's fought a total of 6 tines throughout the story, though the first 4 fights are against his vessels (Dhoulmagus, Evil Jessica and Evil Sir Leopold) whereas the last two fights are against Rhapthorne himself.
- Rhapthorne would later be similar to Nadraga from Version 3 of Dragon Quest X. Both are villains that were sealed away before the events of their games, both wield specters during their fights, and both have very huge final forms.
- However, Nadraga had to be freed by the reunifaction of the 5 regions of Nagaland, the Creator's core, and Estelle as a host, while Rhapthorne needed to be free from the Godbird Sceptre by the deaths of the Seven Sages's heirs.
- Rhapthorne is the first Dragon Quest series villain to succeed in his goal. (Murdering the Seven Sages's heirs, and freeing his body from the Godbird Sceptre) The other two are Nadraga and Mordegon.
Other languages[]
| Other languages | |
| French | Rhapthorne Rhapthorne II |
| German | Rhapthorne |
| Spanish | Rhapthorne Rhapthorne II |
| Italian | Rhapthorne |
| Dutch | Unknown |
| Norwegian | Unknown |
| Greek | Unknown |
| Portuguese | Unknown |
| Russian | Unknown |
| Chinese | 拉布索 (1st Form) 暗黑神拉普索因 (2nd Form) |
| Korean | 랩손 (1st Form) 암흑신 랩손 (2nd Form) |
| This article is a stub. Please help Dragon Quest Wiki by expanding it. |
| Bosses in Dragon Quest IX | |||
|---|---|---|---|
| Storyline | Hexagoon · Wight Knight · Morag · Ragin' Contagion · Master of Nu'un · Lleviathan · Garth Goyle · Tyrantula · Grand Lizzier · Larstastnaras · Dreadmaster · Gadrongo · Greygnarl
| ||
| Post-Game Quests | |||
| Grotto bosses | |||
| Zenus | Equinox · Nemean · Shogum · Trauminator · Elusid · Sir Sanguinus · Atlas · Hammibal · Fowleye · Excalipurr | ||
| Legacy bosses | Dragonlord · Malroth · Baramos · Zoma · Psaro the Manslayer · Estark · Nimzo · Murdaw · Mortamor · Nokturnus · Orgodemir · Dhoulmagus · Rhapthorne | ||